There might ver various reasons why you would want to convert an image format into a PDF. For example, you may want to convert your JPG/PNG resume into PDF format to send it to a company, or you might want to combine multiple images and save it into a single PDF file. Whatever might be the reason, you can convert image files into PDF format easily on Windows 10. Since we have already discussed converting JPG into PDF, we will talk about how to convert PNG files into PDF in this article. Also Read: Best Free Windows 11 Themes, Skins & Icon Packs for Windows 10
Steps to Convert a PNG File to a PDF on Windows 10/11
What’s more important is that you don’t need to use any third-party application to convert your PNG files into PDF. Instead, you can use the Print function of Windows 10 to get your PNG files converted into a PDF. So, let’s check out how to convert PNG files into PDF on Windows 10.
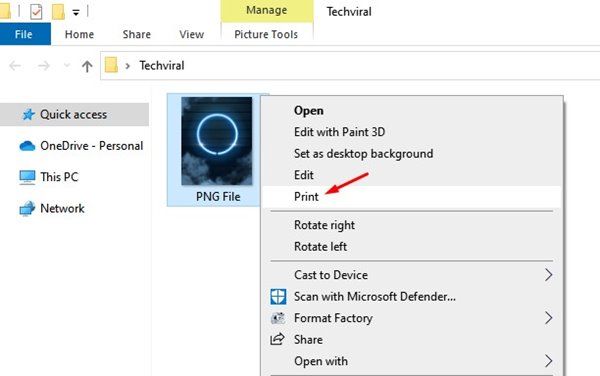
First of all, open the folder where you have saved your PNG files.
Right-click on the PNG file and select the Print option from the context menu.
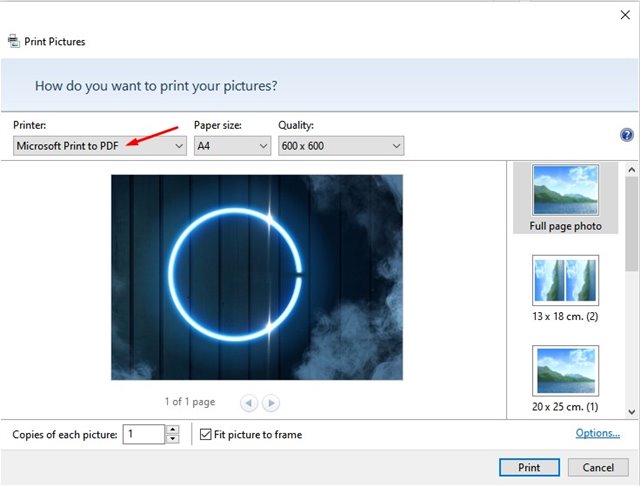
This will open the Print Pictures Window. Under the Printer, select Microsoft Print to PDF. Next, specify the paper size and quality.
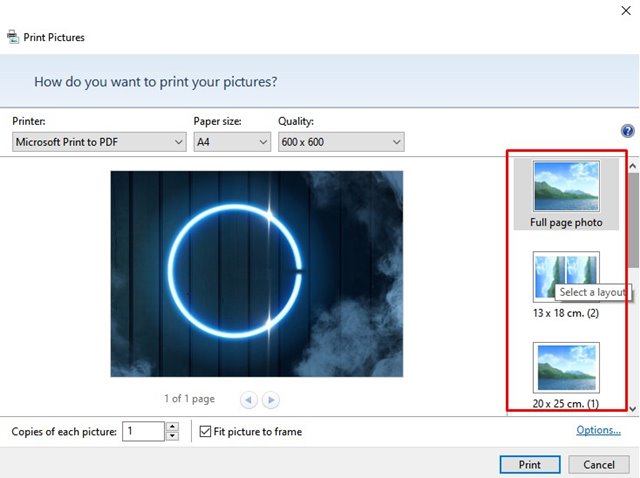
On the right pane, you will have the option to change how your PNG image appears in the PDF. Click on the option to select it.
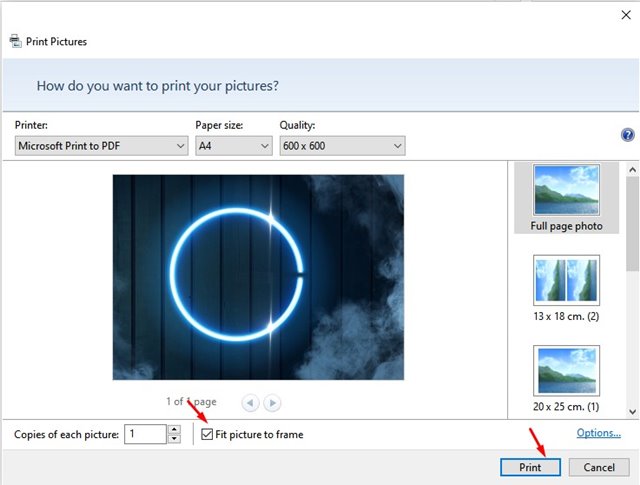
At the bottom of the screen, enable Fit Picture to Frame and click on the Print button.
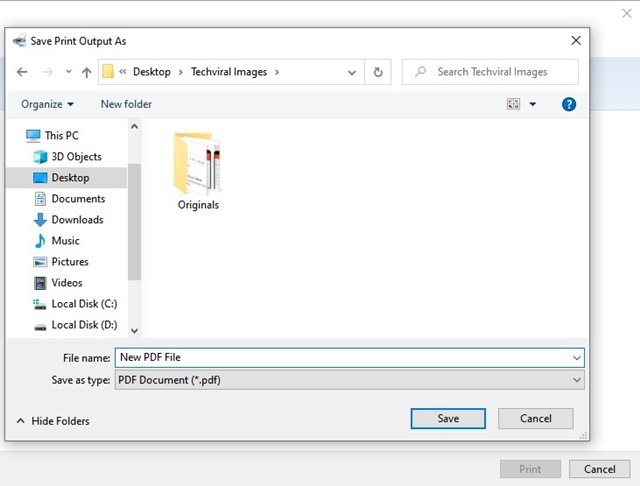
Now, select the folder where you want to save your PDF file. Once done, click on the Save button.
That’s it! You are done. This will convert your PNG file into a PDF format. So, this guide is all about converting PNG files into PDF in Windows 10/11 operating system. I hope this article helped you! Please share it with your friends also. If you have any doubts related to this, let us know in the comment box below.
